Showing posts with label food. Show all posts

Sunday, May 24, 2015

Strawberry Season

It's strawberry season!  The first of the summer fruits to grace us each year is finally at its sweetest, juiciest, ripest peak.  I have been savoring these few precious, fleeting weeks by eating buckets of strawberries from a local strawberry patch and dreaming up countless ways to prepare them.

The first of my creations was for Mother's Day.  I set out to find a recipe for strawberry cake, but I was disappointed to find that most recipes called for strawberry flavoring, strawberry jello or some other variety of fake or frozen strawberries.  I decided to make Ina Garten's Strawberry Country Cake, which is basically a strawberry shortcake.  It is a dense (but not heavy) sour cream cake with a hint of lemon zest, fresh strawberries, and whipped cream.  It was incredibly easy to make and it tasted.....delicious!!  The cake and whipped cream are the perfect accompaniments to fresh strawberries to bring out their flavor and sweetness.  It makes a beautiful-looking cake as well.  Everyone at our Mother's Day gathering loved it!  I have to say, I've never made a recipe from Ina Garten that I didn't like.  She is the queen!

Photo credit to my Grandmother's iPhone

Next up was a strawberry rhubarb pie from Smitten Kitchen.  I had never tasted rhubarb before, but I kept hearing how great it paired with strawberries, and how well it balanced their sweetness and softness.  After making it and finally getting a taste, I have to agree.  The pie turned out just sweet enough, and the crust recipe was maybe the flakiest and tastiest pie crust I have ever made.  Like Ina, I've never made anything by Smitten Kitchen that I didn't like!


Enjoy the strawberries while they last! 

~Ashley

Saturday, May 9, 2015

Summer Rolls Restaurant

A friend and I were looking for a place to eat some lunch. We weren't sure where to go, and I wasn't feeling anything too heavy or greasy. Fortunately, he had the brilliant idea to suggest some spring rolls! Although he said the place was a little far and a little pricey, the idea sounded perfect so away we went!


We ordered two things at the restaurant, and the first thing was a dish called banh beo. It consisted of small plates of steamed rice cake, topped with dried chopped shrimp, scallions, and croutons. We poured fish sauce on top, and scooped it out of the dish with a spoon. It was a little bit salty for my taste. We couldn't figure out what it was that was salty, but it was still delicious! The fish sauce added a little bit of sweetness to the savory dish.


As we were working through the banh beo, our spring rolls arrived! The rice paper came with hot water for soaking, so that it would become pliable for the rolls. The plate of veggies consisted of lettuce, cucumber, carrots, bean sprouts, cilantro, mint, chives, and Asian basil. The meat came grilled and skewered, and everything was ready to be assembled!


We dipped the rice paper in the water, and assembled a little bit of all the veggies on top and added some meat as well. I remembered a YouTube video I watched on spring rolls (linked here), where the girl instructs the viewers to roll "gently but tightly, the way you hug your sweetheart." Unfortunately I don't have any photos of the finished rolls because this was a hands on process, but the spring rolls were fresh, light, and incredibly appetizing! I would definitely recommend this restaurant, and would return for another visit :)

~Tiffany

Monday, April 27, 2015

Bread Baking: No-Knead Multi-Grain Bread

This recipe comes from Sonja and Alex of A Couple Cooks, who adapted it from Zoe Francois's cookbook The New Artisan Bread in Five Minutes a Day.  It is a great find because not only is it delicious, it is incredibly easy to make and it's got some nutritional value.  I stopped buying store-bought bread a while back because of the long list of strange ingredients.  It's nice to be in control of what goes into my bread...at least then I know I won't be eating lots of added sugars, preservatives, and flavor enhancers.  Homemade also just tastes better...and it's not too bad to look at on my kitchen counter!
I started by soaking rolled oats, quinoa, and chia seeds in water.  The recipe calls for sunflower seeds instead of chia, but the sunflower seeds in my pantry mysteriously disappeared before I had the chance to use them.  
The dough consists of all purpose flour, whole wheat flour, rye flour, the grains, water, salt, and yeast.  Basically I just threw it all in the mixer bowl and let it go until the dough was just formed.  I was careful not to over-mix so the bread would be tender and fluffy.  It really is the easiest thing in the world..no kneading necessary.  It's a piece of cake!  Easy as pie!  Why are there no bread puns?!  
Here it is after rising for a couple hours.  At this point I covered the bowl in plastic wrap and stuck it in the fridge to be made the next morning.
Peeling it out of the bowl in the morning was quite the tactile experience.  This isn't the typical smooth bread dough...it formed lots of tiny air pockets which gave it an interesting stretchy-ness and a sponge-like appearance.
Doesn't it look like a sea sponge?!
I divided the dough in half and formed each loaf by tucking the ragged edges underneath to make a smooth ball.  Onto the corn-mealed baking sheet to rest for an hour.
It has risen!
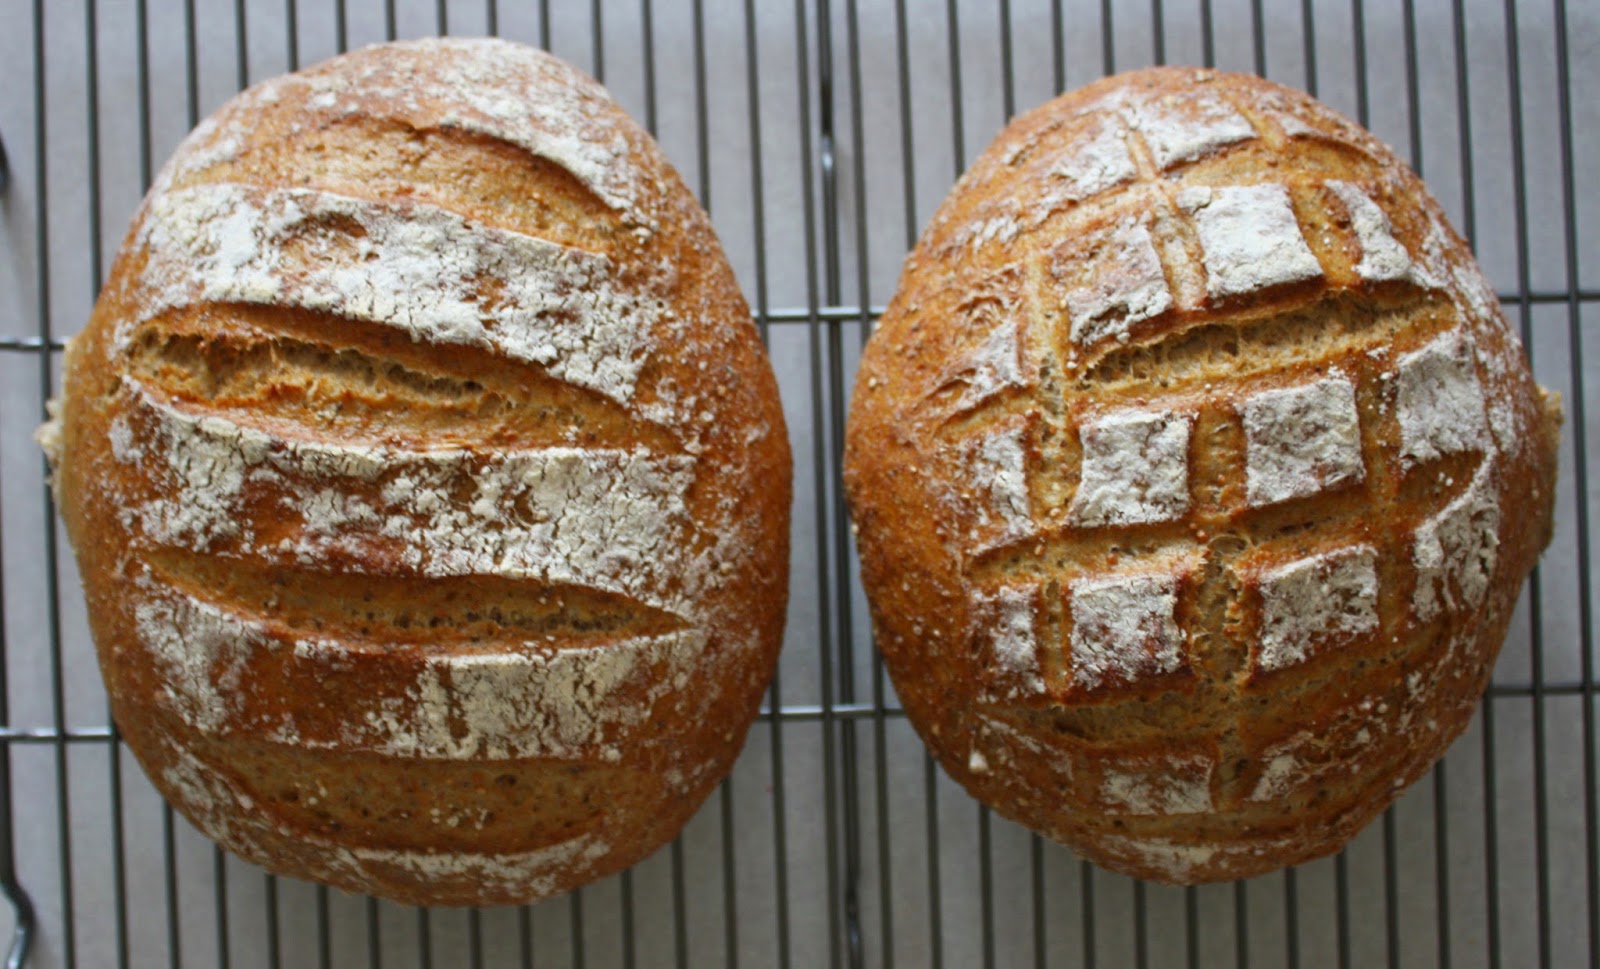
I floured the tops and cut some slashes with a serrated knife.  Quite artist-ique if I do say so myself.
All finished.  This is a hearty bread but it's not so hearty that it's tough or dense.  It's got a nice soft texture and a crunchy crust.  I eat it with my eggs in the morning, as a sandwich at lunch, and on the side at dinner.  I eat it all day!  It's that good.  Thanks A Couple Cooks!

~Ashley

Wednesday, April 1, 2015

Corn Fritters with Avocado Salsa

When spring finally rolls around I'm always tired of hot and heavy winter stews and I crave something light and fresh.  These fritters with avocado salsa strike a nice balance between light and filling, making them perfect for spring.  They're also delicious and surprisingly simple to make. Here's how I made them (recipe at the bottom):
 
I diced up some red onion...

   
...and minced a clove of garlic.

I cubed a couple avocados


and I diced a tomato.


I finely chopped some jalapeño...

...some cilantro...

...and a scallion.

I added all the ingredients to a bowl and sprinkled over a little salt.

I squeezed in half a lime.

I added a little red wine vinegar.

And finally, a drizzle of olive oil.


All mixed together, here is the avocado salsa!

...

Now for the corn fritters:
I drained a can of sweet corn and dumped it into a bowl.

In went some red onion and scallions.


I measured in some all purpose flour.


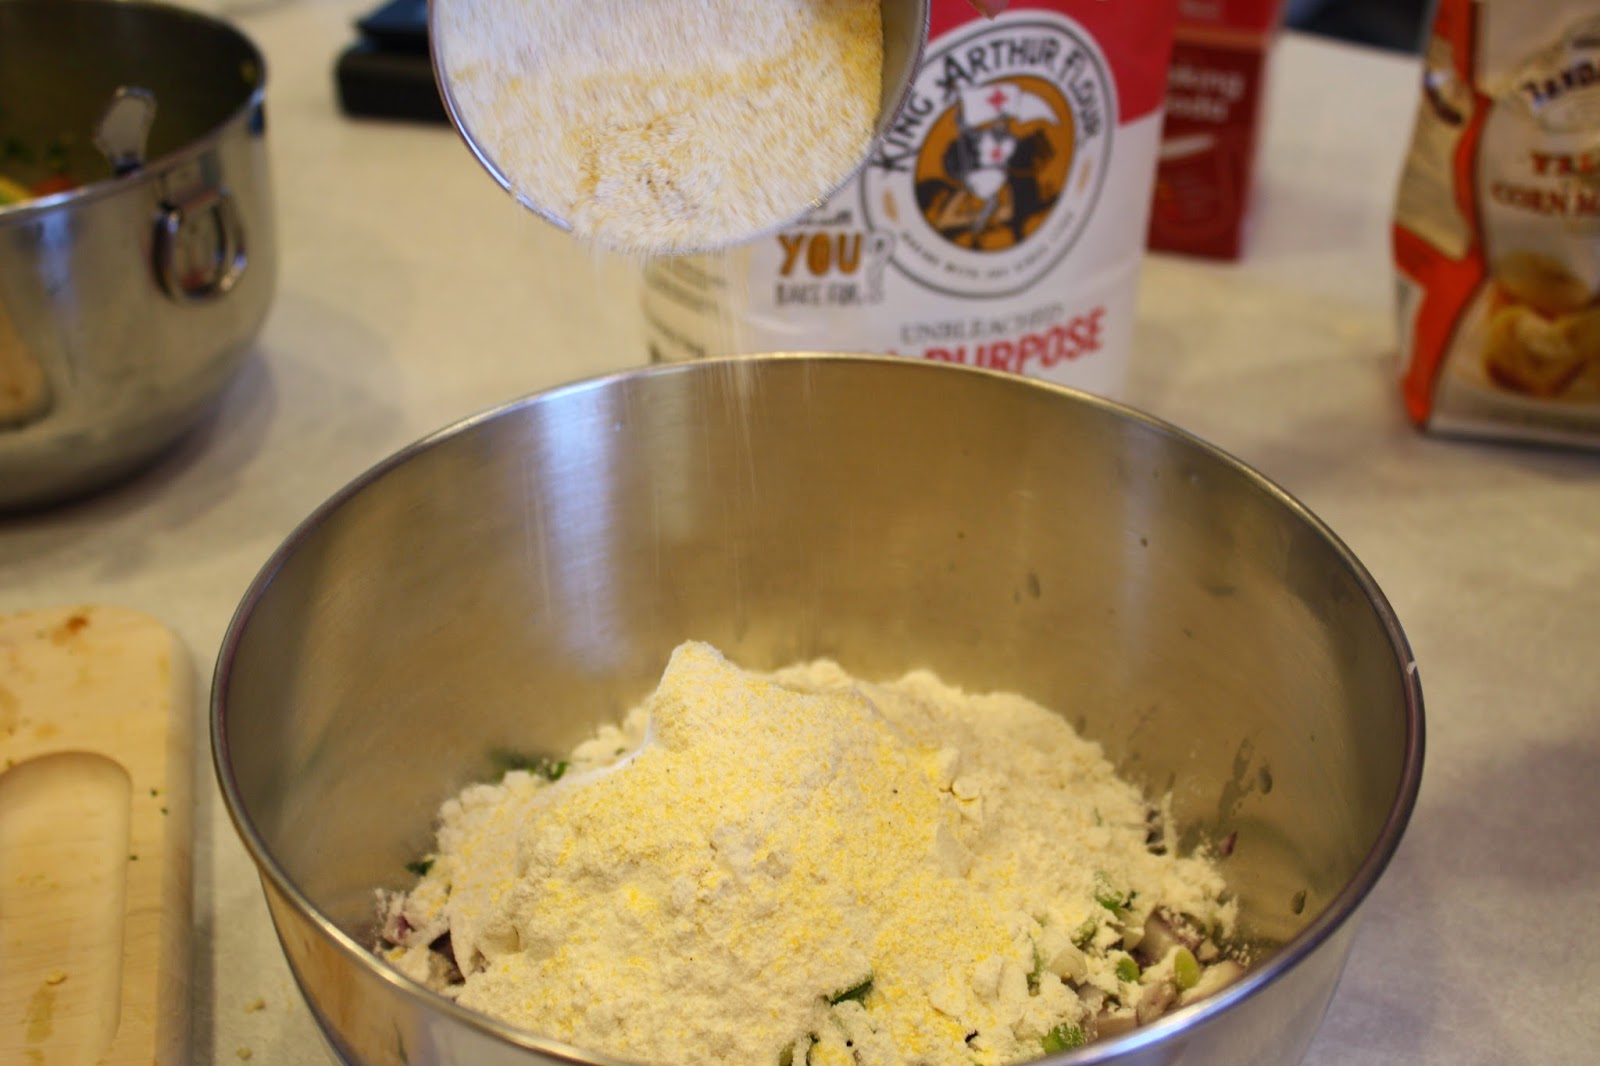
Then I measured in a little cornmeal.
In went some baking powder...
...and some baking soda.

I melted some butter and added it to the bowl with two eggs and milk.

And I mixed it all up.

I made 7 fritters from this recipe.

Into the hot pan with coconut oil.


I fried them until golden brown on each side.


Beautiful and so delicious!


Corn Fritters with Avocado Salsa
For the Salsa:
2 ripe avocados, cubed
1 tomato, diced
1 1/2 Tbsp red onion, finely diced
1 clove garlic, minced
1 tsp jalapeño, finely chopped
1 Tbsp fresh cilantro, chopped
1 scallion, chopped
Juice from 1/2 lime
3 tsp red wine vinegar
2 tsp olive oil
1/2 tsp salt

Mix all ingredients in a medium bowl.

For the Fritters:
1 can sweet corn, drained
1/2 cup red onion, chopped
2 scallions, chopped
1 cup all purpose flour
1/2 cup cornmeal
1 tsp baking powder
1/2 tsp baking soda
2 Tbsp butter, melted
2 eggs
2 Tbsp milk
1 tsp salt

Mix all ingredients in a bowl.  Form 6-8 fritters.  Heat vegetable or coconut oil over medium high heat in a skillet until hot.  Add fritters and fry each side 2-3 minutes until golden brown and cooked through.  Drain on paper towels and serve topped with avocado salsa.

~Ashley


Wednesday, March 25, 2015

Bread Baking: Honey Wheat Bread

If I had to pick my last meal on earth, it would definitely include homemade bread with lots of butter.  I don't think there is anything better.  In a quest to clean up my diet and eliminate weird chemical additives from my food (such as this shoe rubber) I have taken up bread-baking as a weekly habit.  All kinds of cooking are like therapy to me, but bread-baking is particularly satisfying.  After only a few hours in the kitchen (most of it downtime waiting for the bread to rise) you are presented with beautiful loaves that will be a staple of your diet for the next week or two.  That is the magic of flour, water, and yeast!  This recipe for honey wheat bread produces two crusty brown loaves with soft, fluffy insides.  It makes perfect toast in the morning, perfect sandwich bread for lunch, and a perfect snack for anytime.  Here's how I make it:
I measured out 3 cups of whole wheat flour and 2 cups of all-purpose flour.  I have the best luck with King Arthur brand flour, not sure why, but I think it's because it's made specifically for baking.  Dough just seems to rise better with this stuff.

This recipe used up the last of my beloved quart jar of local honey, but it was worth it in the end!  I ate this whole jar of honey surprisingly fast.  Well, maybe not so surprisingly.  I eat honey like Winnie the Pooh.  
If you're like me and not a fan of molasses, have no fear because you can't taste it in the finished loaves!  It adds a nice depth to the flavor and boosts the sweetness of the honey in the bread.

In goes 4 Tbsp of salted butter!

2 Tbsp of molasses up next

1/4 cup of honey joins the pot

1 tsp. kosher salt last to arrive

Mix 'er up!

I set 2 cups of water over the stove and heated it until a candy thermometer read 110 degrees Fahrenheit, no more, no less.  I poured the water into a bowl (separate from the honey mixture) and sprinkled 2 & 1/2 tsp active dry yeast on top and let it foam for 10-15 minutes. 
I've found heating the water just right to be crucial in getting the yeast to activate.  If the water's too cool, the yeast will sink right to the bottom.  If the water's too hot, it might be too hot for the yeast to handle.  110 degrees F is just right.

I poured the yeast and water into the honey mixture (in the bowl of a mixer) and mixed them to combine.  Then, I added the flours and mixed until it formed a dough.  Here, I've turned it out onto my floured countertop.  I kneaded it for about 3-4 minutes before I achieved a smooth baby's bottom texture.

Once it felt like a baby's bottom, I grabbed a tablespoon of softened butter and rubbed it around my mixer bowl and dropped the dough in.  I flipped it over to coat both sides in the butter and keep it from drying out.

I soaked a dish towel in warm water and wrung it out until it was just damp and covered the bowl.  It took an hour for the dough to double in size.  I took this time to clean the huge mess I'd managed to create in the kitchen and watch an episode of 19 Kids and Counting on TV (my guilty pleasure heheh).

I (literally) punched the risen dough down and let it rest for 5 minutes while I sprayed two loaf pans with vegetable oil.  Then, I divided the dough in two and tucked the ragged edges under to form two smooth balls.  I let them rise in the loaf pans for an hour.  After an hour, the dough filled the loaf pan nicely.  I baked them for 35 minutes at 375 degrees F.


Voila!  Beautiful, delicious, (semi) healthy honey wheat bread!!

After 10 minutes I turned them out onto a cooling rack.

But I couldn't resist eating a slice or two...or three...before it cooled!

Honey Wheat Bread
Makes 2 loaves

Ingredients:
4 Tbsp salted butter, softened
2 Tbsp molasses
1/4 cup honey
1 tsp kosher salt
3 cups whole wheat flour
2 cups all purpose flour
2 cups 110 degree F water
2 1/2 tsp active dry yeast

Instructions:
Sprinkle the yeast onto the warm water in a large bowl.  Allow to activate and form a white foam for 10-15 minutes.  Mix softened butter, honey, molasses, and salt in the bowl of a mixer.  Add activated yeast and flours.  Mix until dough forms.  Turn out onto floured surface and knead for 3-4 minutes until smooth.  Place in buttered bowl, flip to coat, cover with damp cloth and allow to double in size for an hour.  Punch dough down and allow to rest for 5 minutes.  Spray two loaf pans.  Divide the dough into two balls and tuck under rough edges to form smooth top.  Allow dough to rise in loaf pans for an hour.  Preheat oven to 375 degrees Fahrenheit and bake bread for 35 minutes.  After 10 minutes cooling in pans on countertop, turn out onto cooling rack and cool completely before storing.


~Ashley

Related Posts Plugin for WordPress, Blogger...